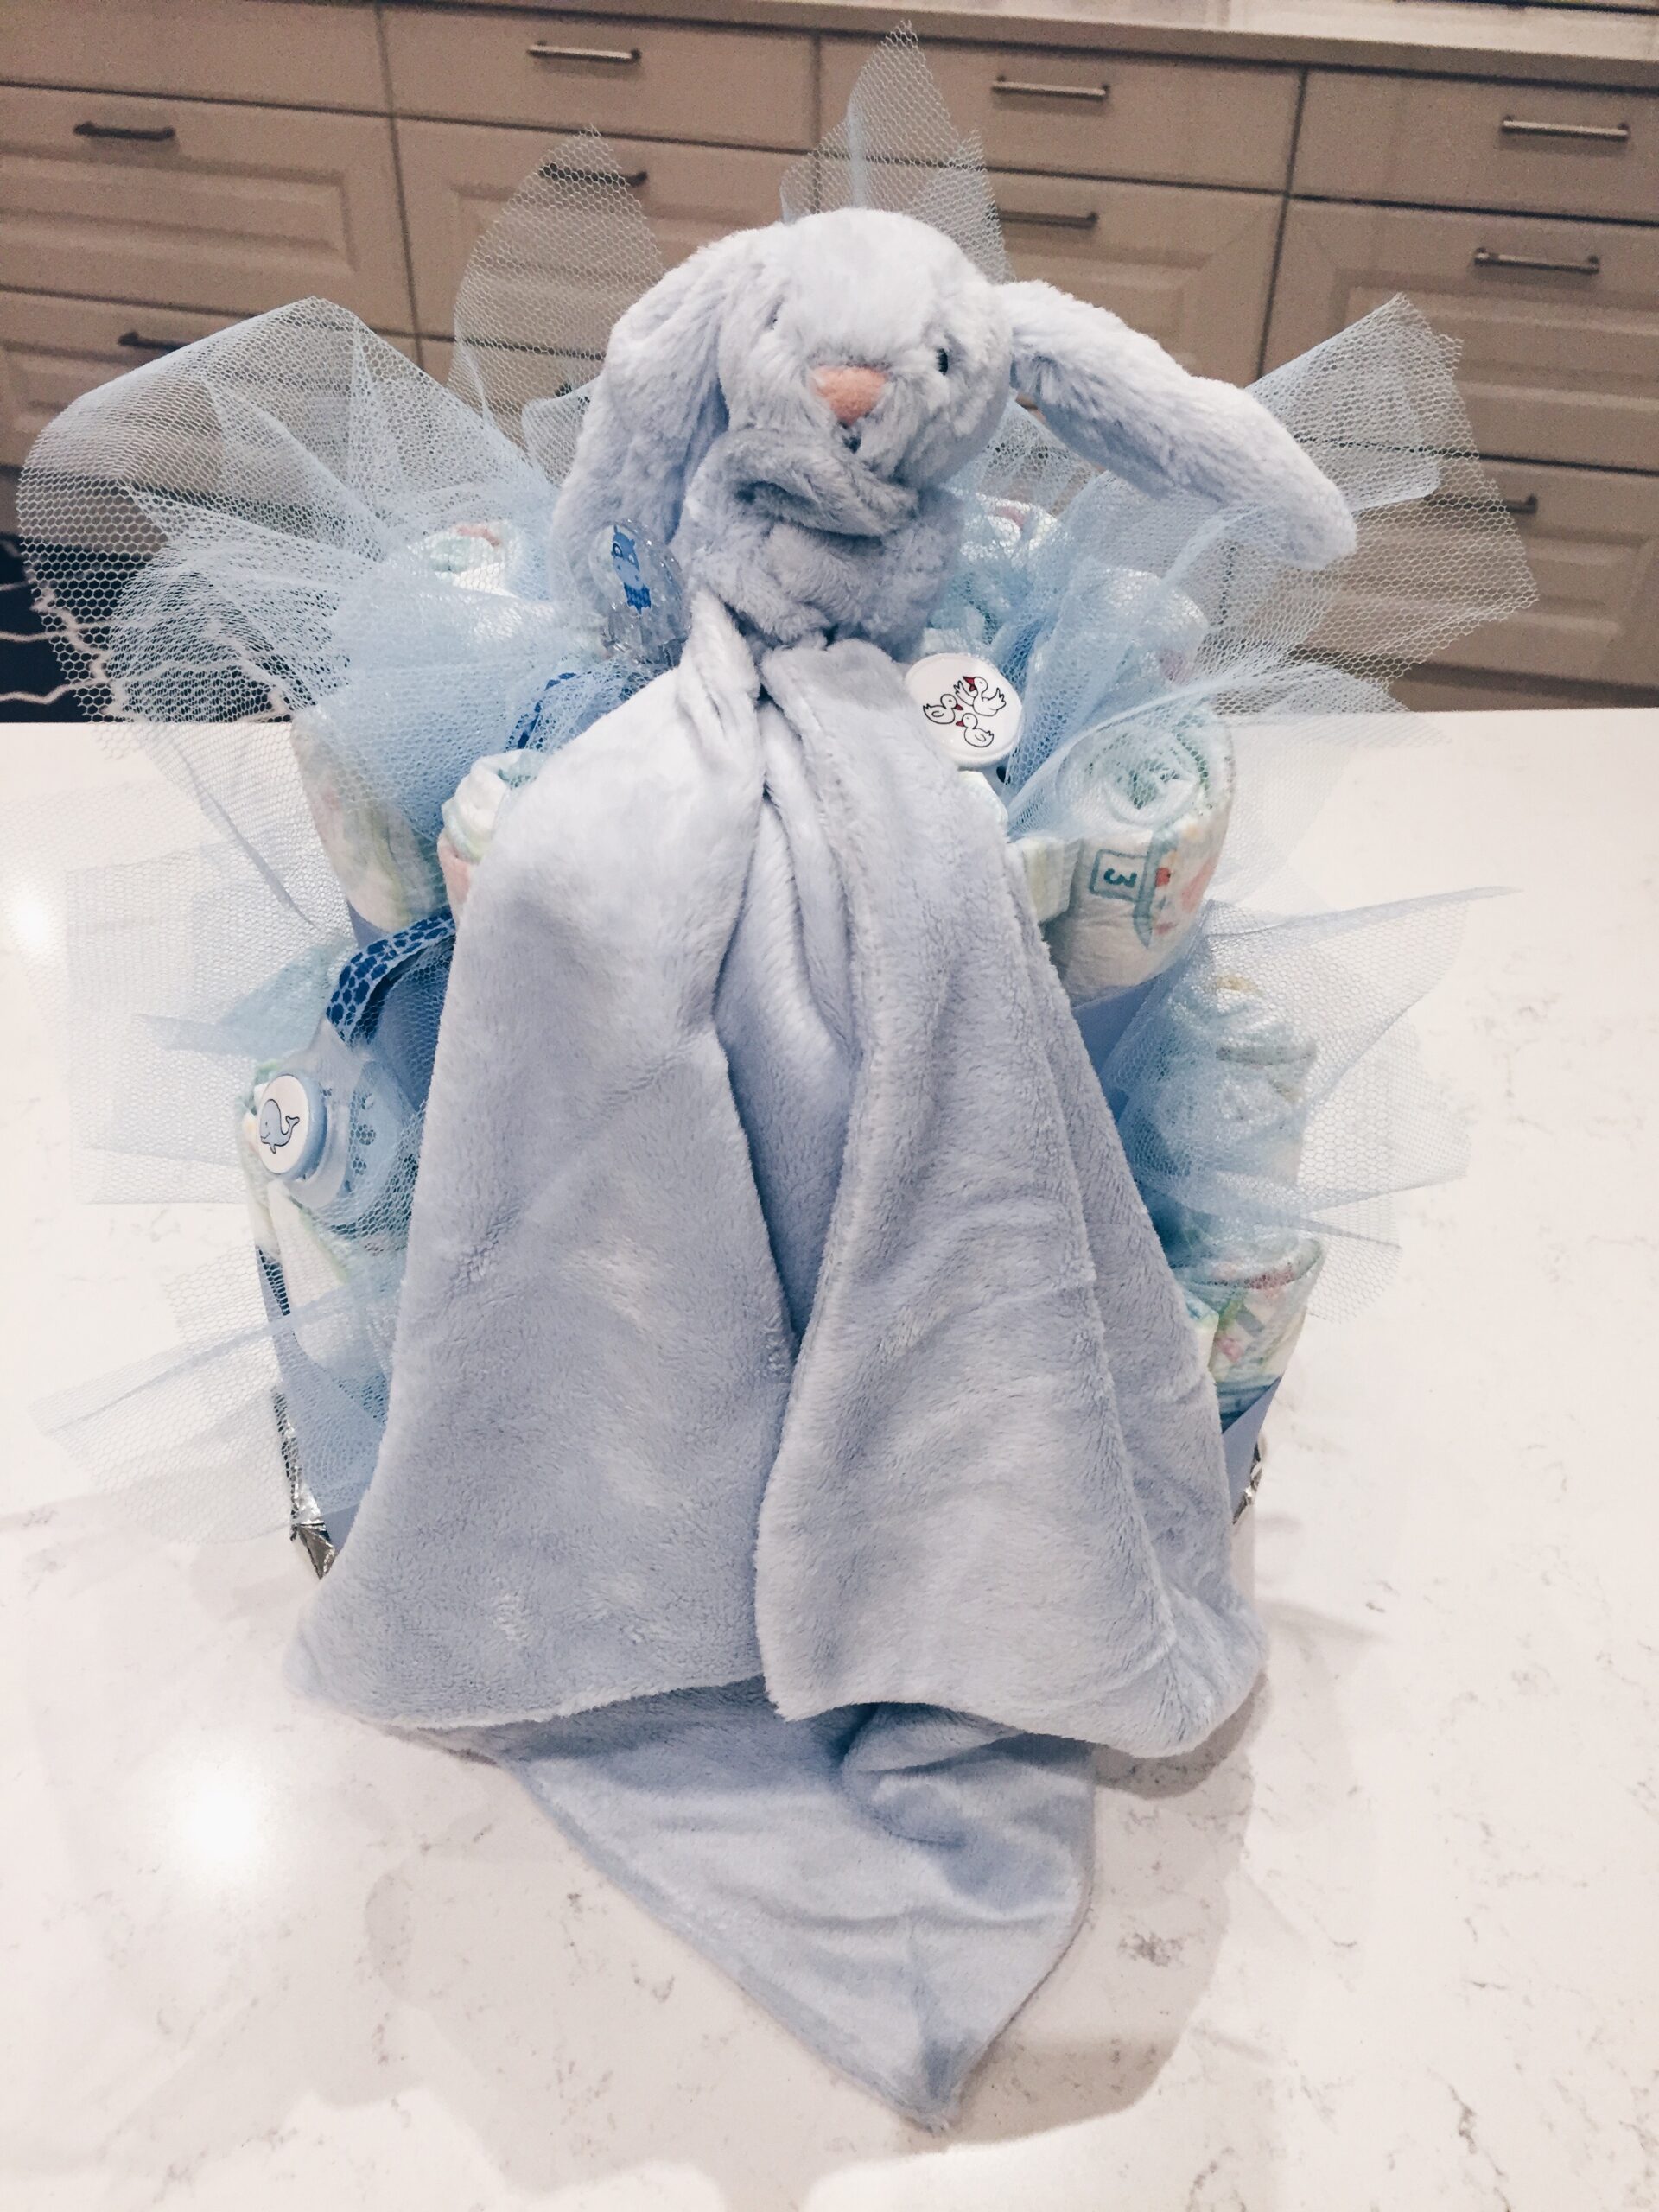
Having a baby shower when you’re expecting is a pretty common event in the US, but it’s not as common here in Sweden. Over the last few years I’ve seen an increase in US influences on Swedish culture. For example, Halloween is becoming more popular and so is Valentine’s day!
So when my good friend told me she was throwing herself a baby shower I thought I needed to make something special. So I made her a diaper cake! It’s super simple to do and makes for a cute centerpiece.
There are a number of ways to make a diaper cake, but this is how I created mine.
First you’ll need the following supplies:
- An empty paper towel roll
- Wrapping paper
- A round cake sheet (or just cut a round cardboard)
- Diapers (54 diapers makes a 2 tiered cake)
- Tape or rubber bands
- Thin wrapping ribbon
- Thick fabric ribbon
- Tulle or color tissue paper
- A glue gun
- Some toys or small stuff animal as a topper

Step 1: Making the Base
Cover your round cake cardboard with the wrapping paper. This will serve as the base of the cake. You only need to cover one side as the other side will be covered with diapers. I used the glue gun to make sure it stuck.

Step 2: Making the Pillar
Place your empty paper towel roll in the center of the cake cardboard and secure with your glue gun. You will need it hold it down in place for a few seconds. Make sure it’s standing upright when you release it.

Step 3: Rolling Diapers
Take your diapers and roll each one securing each with a rubber band or tape.

Step 4: Making the 1st Tier
Take each rolled diaper and work your way around the paper roll pillar. Tie off each round to with the wrapping ribbon to keep it secure. Keep doing this until you reach the edge of your cake base. Secure your tier with the thin wrapping ribbon by tying a knot and cutting the ends. You want to secure this ribbon closer to the base because you’ll be covering it later with the larger fabric ribbon.

Step 5: Repeat step 4
Keep working your way until you reached the top. If you have more diapers you can make a larger cake, I’m making a 2-tiered cake.

Step 6: Adding the Thick Ribbon
So like any wedding cake you’ve seen, they usually use ribbon at the base of each tier. You’ll do the same with your thick fabric ribbon. I used my glue gun to secure the ends. Make sure to cover the thin wrapping ribbon.


Step 7: Add the Frosting
Take your tulle or colored tissue paper and fold them into cake. I used it on each tier to bring the cake to life and to create a little drama.


Step 8: Adding some details
Now your cake is nearly complete and it looks great! In order to hide the paper roll at the top, I bought this super soft little teddy bear with a blanket to drape on top. He’ll make a great cake topper. I also bought some pacifiers and pacifier leashes to drape on the sides of the cake. It’s decorative, but also functional! She will be able to use every part of this cake.

And there you have it! It’s super easy and a show-stopper. Please share with me the cakes you’ve made! I’d love to see what you incorporate into your own cakes!

